Installation : Installation Wizard and Properties File
Installation Wizard and Properties File
Configuration of Orchestra Central to use Oracle, SQL Server or PostgreSQL database is performed with the use of an Installation Wizard, in combination with a properties file.
The Installation Wizard, install.bat (Windows) or install.sh (Linux), or properties file, is run as a part of the complete installation process, described in “Orchestra Central” . Also, the Installation Wizard, or properties file, is used during Upgrade.
If you want to use a mixed setup, i.e. multiple databases, this can only be setup in the properties file, not in the Installation Wizard.
It is possible to start the installer in silent mode (install.bat -s for Windows / install.sh -s for Linux), i.e without a graphical user interface and with no user interaction needed. This is recommended, if you want to use named instances.
Since the “Qmatic Platform” script is automatically started by the Installation Wizard, it is important to keep the Services window closed during this process.
Settings in the Properties File
The file install.properties is included in the installation package, next to the install.bat / install.sh file.
In this file, you can go into the details (that are not totally covered by the Installation Wizard) of your wanted configuration, when installing Orchestra.
If you want to use a mixed setup, i.e. multiple databases, this can only be setup in the properties file, not in the Installation Wizard.
For information about which platforms that are supported, please see “Supported Platforms” .
The settings configured in the properties file are read by the Installation Wizard. Also, when changing the settings in the Installation Wizard, the properties file is updated, in the background, and can therefore be saved and used again for installations with the same or similar configuration settings.
In the file install.properties you uncomment/comment the various settings, until it conforms to the way you want your installation to look. The settings are described in more detail below:
Installation
• operation - choose between installation and upgrade - in this case, of course, you should select installation.
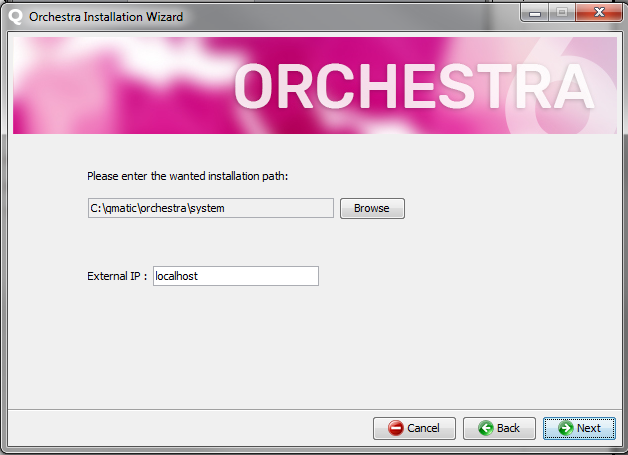
• install.path - enter the path where you want Orchestra to be installed.
Please specify double backslash characters when using Windows paths (or use a single front slash instead: "c:/qmatic").
If you try to install to, for example, c:/qmatic/orchestra/system, or another folder that is not empty, you will get an error message and the installation will be aborted.
We recommend that you always install to a path that does not contain a space in the path name.
Application Server
• heap.size - default is 4096.
• external.ip - default is localhost.
• application.server - default is wildfly, other alternative is jboss.
• jboss.zip.path - enter the path to where the jboss-eap-6.3.0.zip is located. (Only applcable if jboss was selected as application server.) The only supported version is 6.3.0.
Orchestra
• orchestra.configuration - decide if you want Orchestra to be installed with or without a basic configuration. For more information about the basic configuration, please see “Basic configuration” .
• application.* - in this section enter true for the applications that you want to install and false for the applications that you do not want to install.
The following applications will be installed, by default:
• Central
• Workstation
• Reception
• Stat
• Connect Counter
• Help
• Notification
• Auditing - can only be enabled/disabled using the silent installer.
Optional applications are:
• Business Intelligence
• SDK
• Calendar
• Connect Concierge
• Hardware Monitoring
API Gateway
• api.gateway.install - decide whether or not API Gateway should be installed
Postgres
This setting will install Postgres 9.2 as a separate service.
• postgres.install - decide whether or not PostgreSQL should be installed.
• postgres.port - enter the PostgreSQL port number. Default is 5432.
Database settings
If you want to use a mixed setup, i.e. multiple databases, this can only be set up here, in the properties file, not in the Installation Wizard.
Enter which database (postgres, mssql, or oracle) you want to use for Central, Queue Agent, Queue Widgets, Calendar, Statistics, Business Intelligence, and Auditing.
In the SQL Server/Oracle/Postgres sections, make sure that all the settings, such as port, user name and password, are correct.
The port setting for SQL Server databases should be left empty if named instances are used.
Example: *.db.port =
If the port has to be specified, use a regular host name, or IP. The URL must be appended with the instance name, separated by two backslash signs, as in the following example: central.sqlserver.db.host = 127.0.0.1\\MYDBINSTANCE.
If you want to use named instances, you should also run the installation in silent mode!
Here, you also find (and update, if needed) the specific settings for the Business Intelligence Repository (audit, hibernate, quartz, and jackrabbit), for each database.
Once you have gone through and updated the Properties file, you are ready to start the installation, either as a headless installer, or using the Installation Wizard.
Settings in the Installation Wizard
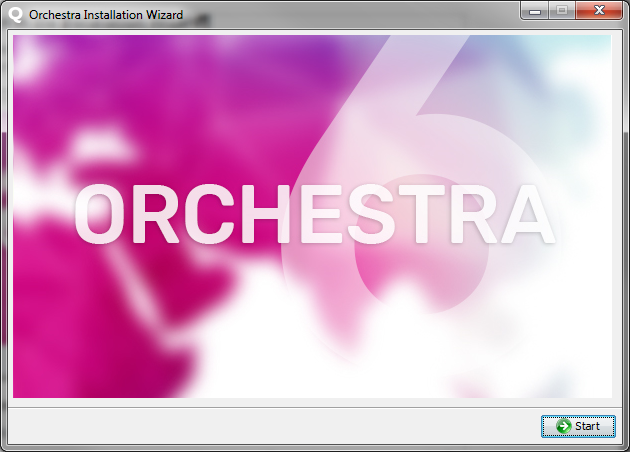
When the Installation Wizard, install.bat (install.sh for Linux), is started, you first click Start, to start the configuration procedure:
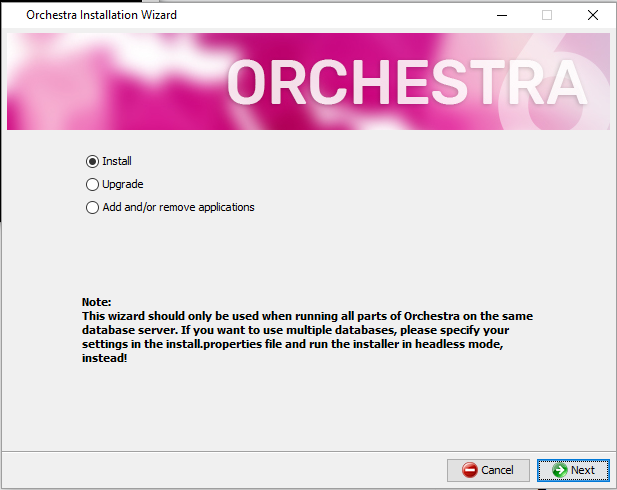
The following choices need to be made:
• Is this an Installation, an Upgrade (either an Update, or an upgrade from a previous Orchestra version), or are you adding and/or removing applications?
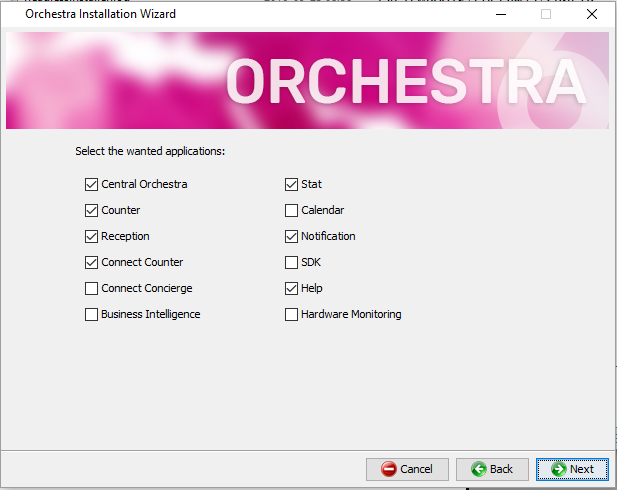
• Which Orchestra applications you want to install:
Central Orchestra
The software of central Orchestra.
Counter
The software of the Counter terminal.
Reception
The software of the Reception terminal.
Connect Counter
The software of the Connect Counter application.
Connect Concierge
The software of the Connect Concierge application.
Business Intelligence
The software of Orchestra Business Intelligence. For more information, please see the Orchestra Business Intelligence User’s Guide, which can be found on Qmatic World.
Auditing
Auditing functionality. For more information, see “Auditing” .
Stat
Statistics.
Calendar
The software of the calendar.
Notification
The software of the Notification application.
SDK
Software development kit for Orchestra. Useful when developing custom applications.
Not suitable for production deployments.
The url to use to access the SDK, after it has been installed, is:
http://<ORCHESTRA_IP>:8080/sdk
Help
The Orchestra On-line Help. If you decide not to install it, the text “Not installed” will be displayed if the Help icon, , is clicked.
Hardware Monitoring
Used for easy access to the Hardware Monitoring Dashboards.
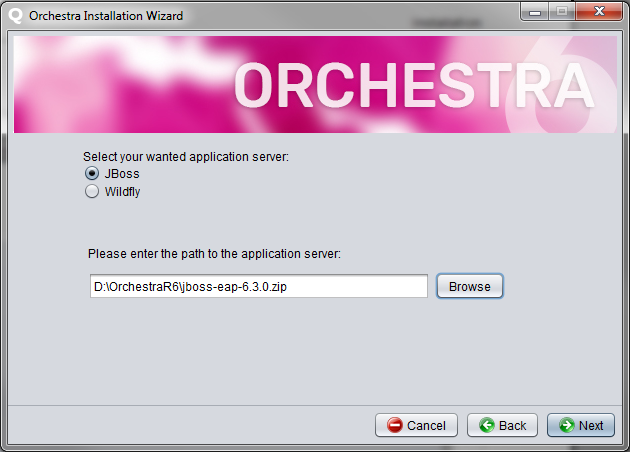
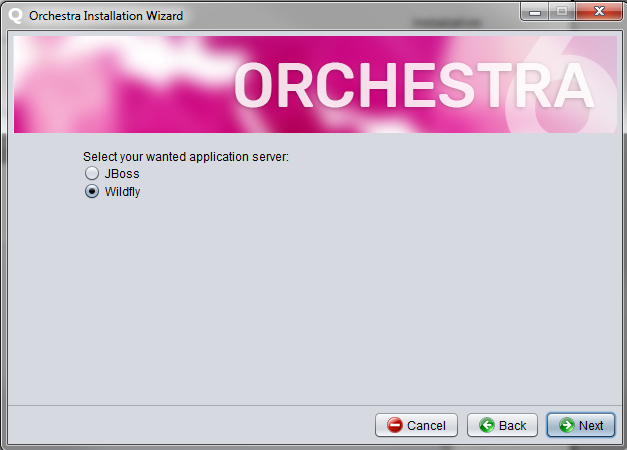
• The wanted application server:
For JBoss, please also enter the path to the JBoss zip-file:
For Wildfly, however, no further input is needed:
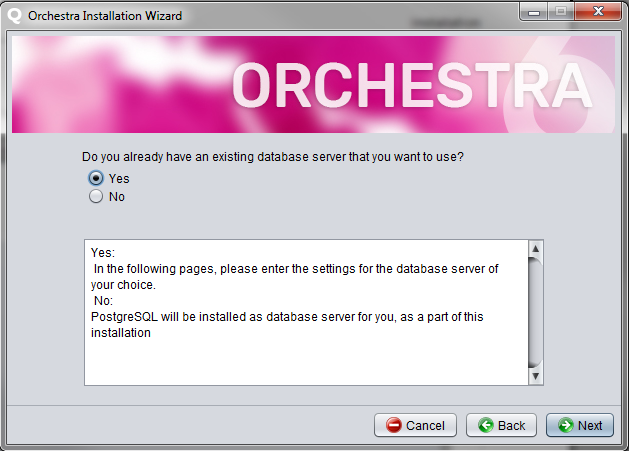
• Whether or not you already have an existing database server that you want to use:
If you select Yes, you will need to enter the settings for your wanted database server in the following pages.
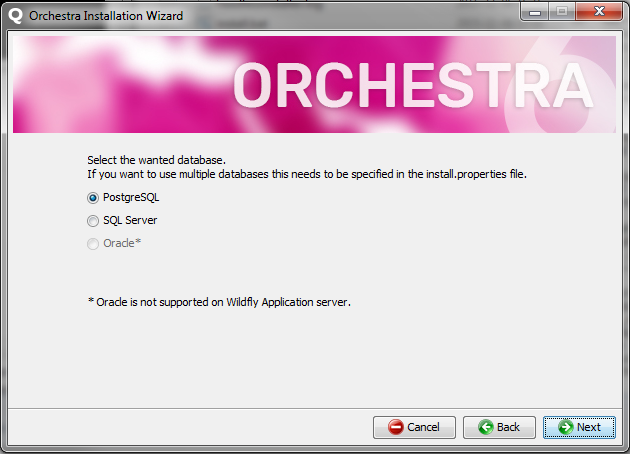
As you can see, in the image above, Oracle is not supported, if you selected Wildfly as application server in a previous step. For more information about supported platforms, see “Supported Platforms” .
If you select No, we will install PostgreSQL for you.
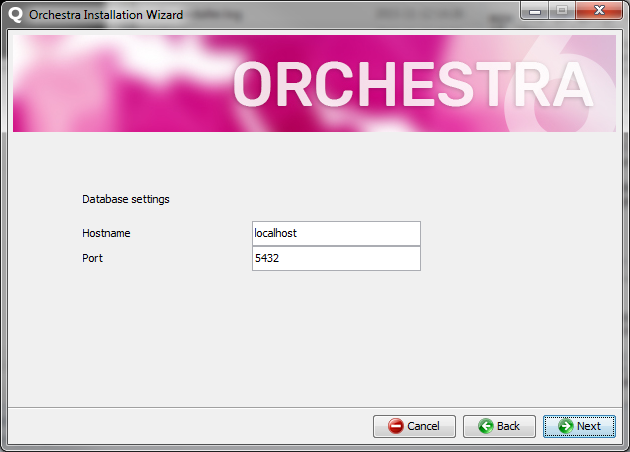
If you select Yes, then PostgreSQL, the Database settings page looks like this:
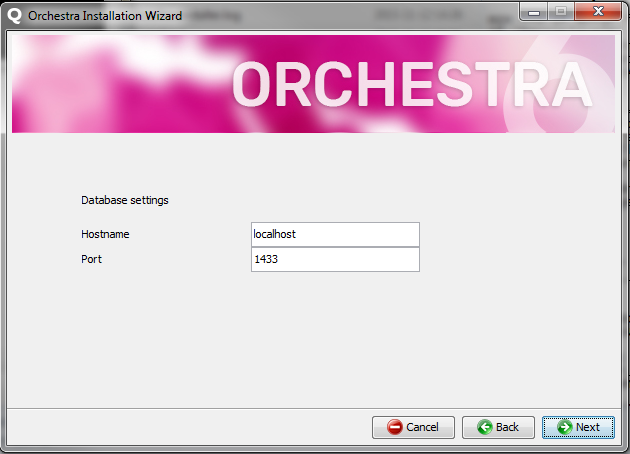
If you select SQL Server, the Database settings page looks like this:
If you select Oracle, the Database settings page looks like this:
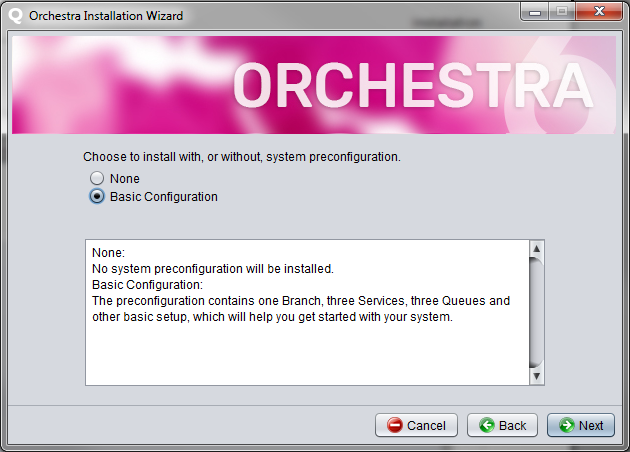
• Choose whether or not you want to install Orchestra with a system pre-configuration:
It is only possible to select a pre-configuration, if Central was selected as an application earlier in the installation.
If you select the Basic Configuration, Orchestra will be installed with a configuration containing one Branch, three Services, three Queues and other basic settings, to help you get started with your system. To read more about the available pre-configuration(s), and needed post-installation set-up, please see “Chosing a system pre-configuration” .
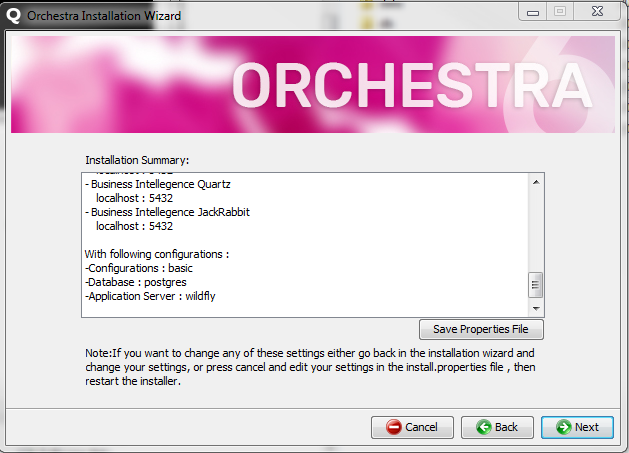
When all choices have been made, you will get a summary of what will be installed and where:
From here, it is also possible to click on Save Properties File, to select a location that you want to save the updated properties file to.
It is possible to go back and change settings, before starting the actual installation.
Start the installation by clicking Next.
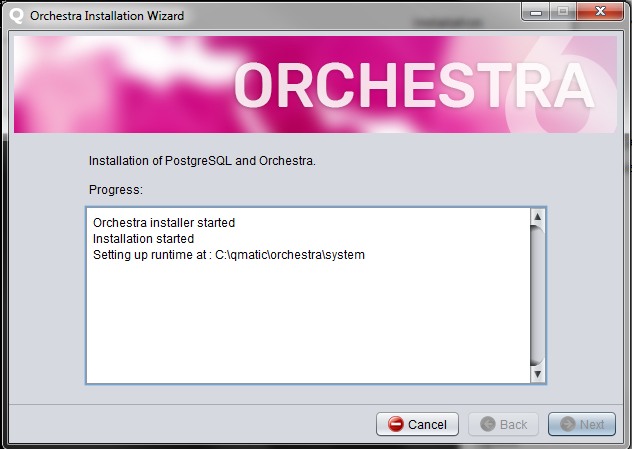
On the following page you can follow the progress:
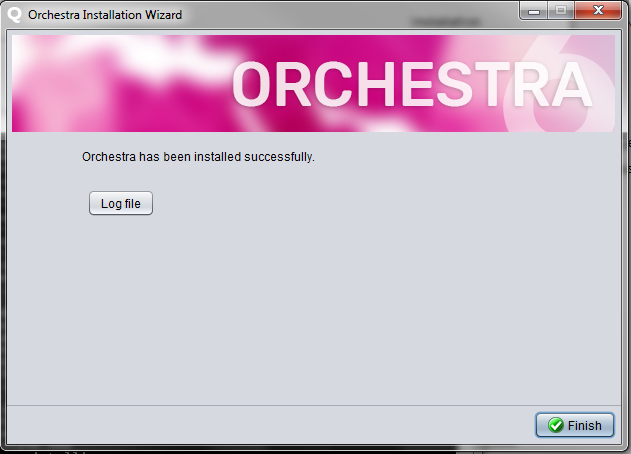
You will get a message that the installation has been completed successfully. Click Next.
From this page, it is also possible to open and view the installation Log file.
When done, click Finish to end the installation and close the wizard.
The “Qmatic Platform” service is automatically started by the Installation Wizard.
Chosing a system pre-configuration
During the installation procedure, you are offered the possibility to choose a system pre-configuration. This could be useful, if you for example are planning to use a standard system set-up.
You will start Orchestra with a working default configuration. After installation, however, you need to change a few settings to get a fully working system.
Below is a description of the available system pre-configuration.
Basic configuration
This configuration, in short, contains 5 Counters, 3 Services, 3 Queues, 3 Workprofiles, 3 printers, LCD Main and counter displays, and Software terminals.
Below is a more detailed list of the contents of this configuration:
• Unit Types:
• WebReception
• WebServicePoint_PositionalDisplay
• Cinematic
• Intro5
• Intro8
• Intro17
• GW1745
• Widgets
• Ticket Call - mapped to applicable surfaces
• Ticket Call History - mapped to applicable surfaces
• Scrolling Text - mapped to applicable surfaces
• Services
• Service 1 - Serving time 5 min, setting Booking enabled is enabled
• Service 2 - Serving time 5 min, setting Booking enabled is enabled
• Service 3 - Serving time 5 min, setting Booking enabled is enabled
• Operation Profiles
• Operation profile 1 - Service 1->Queue 1; Service 2->Queue 2; Service 3->Queue 3
• Queues
• Queue 1 - No. series 001-199, Service Level 5 min.
• Queue 2 - No. series 200-399, Service Level 5 min.
• Queue 3 - No. series 400-599, Service Level 5 min.
• Work Profiles
• Queue 1 - Call Queue 1, based on waiting time (WT)
• Queue 2 - Call Queue 2, based on waiting time (WT)
• Queue 3 - Call Queue 3, based on waiting time (WT)
• Longest waiting time all queues - Call from all Queues, based on waiting time (WT)
3. Change the IP address setting for all of your printers (in this case Intro 5, Intro 8 and Intro 17), to IP addresses used at your site. This is done in the Business Configuration application, in the Branches tab. Open the Branch(es), scroll down to the Equipment Configuration section and change the IP addresses for each printer. For more information, see the Administrator’s Guide, found on Qmatic World.
4. Save and publish the Branch(es), regardless if you have hardware or not connected to it. Publishing can be performed either in the Branches tab, or in the Publishing tab of the Business Configuration application.
When the Branch(es) has been published, the Counter and Reception applications will be available for the Users that are connected to those Roles. Also, if applicable, the Appointment reception application will be available.
Optional Site Specific Settings
To make the configuration better suit your needs, you can customize the names of Services, the Operation Profile, Queues, Work Profiles, Surface Applications, Equipment Profile and Branch. This is done in the Business Configuration and Surface Editor applications.
For your Queues you may want to change the Service Levels and for your Services you may want to change the serving time. The serving time is used for estimated waiting time calculations. This is done in the Business Configuration application.
You can, naturally, also add Users with other or the same Roles as the already existing Users. This is done in the User Management application.
For more information about how to perform all these changes, please see the Administrator’s Guide, found on Qmatic World.
 The Installation Wizard, install.bat (Windows) or install.sh (Linux), or properties file, is run as a part of the complete installation process, described in “Orchestra Central” . Also, the Installation Wizard, or properties file, is used during Upgrade.